Showing posts with label tutorial. Show all posts

Sunday, July 27, 2014

Fish & Tag


Hi,

This week the challenge @ Scrappy Hands is to use a punch.
Well - not a huge challenge...
I took pictures for a tutorial to create this fish using 2 punches: circle & heart.
You can find the tutorial here


Thanks for looking :-)

Wednesday, April 16, 2014

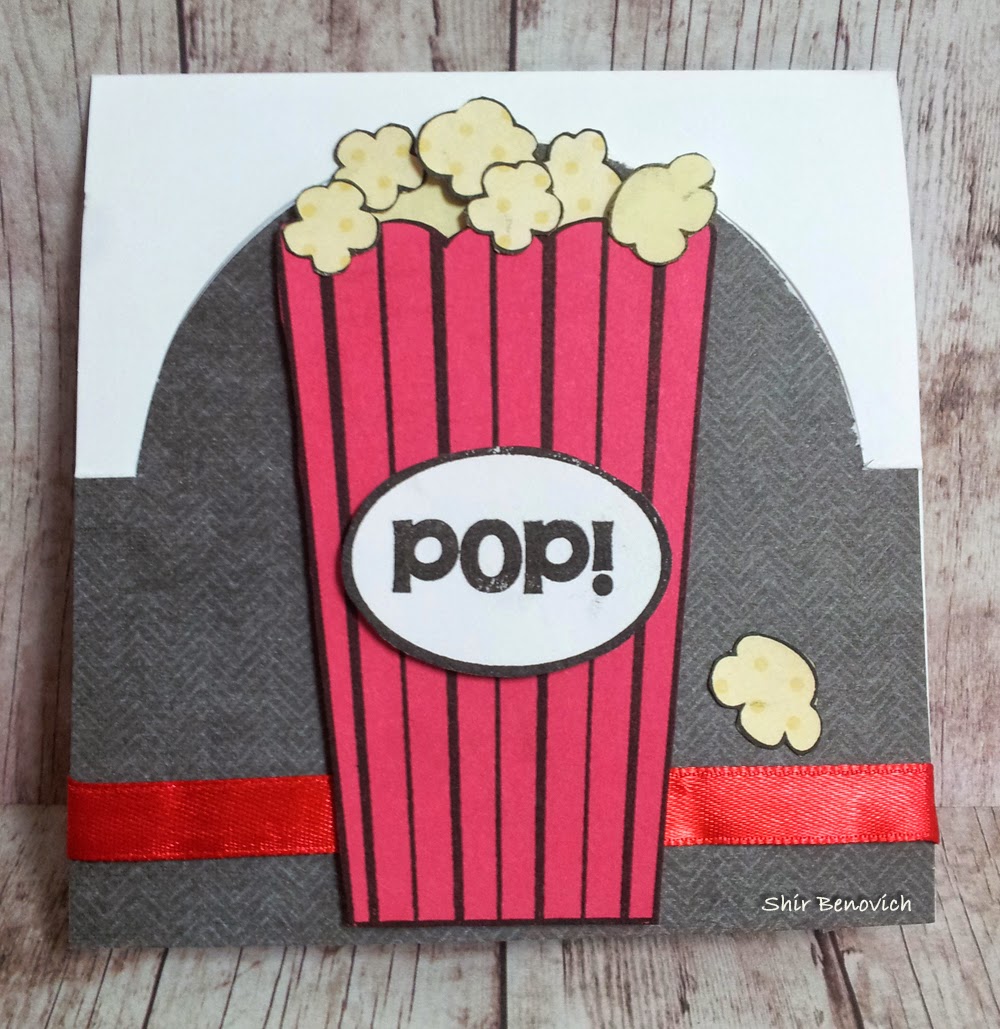
"Standing card" tutotial


I don't know how to call this card, but I took pictures on how I made it..
First - let's see the finished card:

When it's closed:
 Open:
 Side view:

And now for the tutorial:

I won't give the exact measurements, but the concept of making the card.
Start with your card base, scored half way:

Cut half circle - the side that is close to the scoring line (I used Coluzzle, but any other way to cut half a circle is OK):

 This is how it should look like:

And when you "pop" the half-circle out - crease the folds (where the half circle "meets" the edges of the card:

Temporarily adhere your background paper:

Turn the card inside out and cut the half circle on the background paper as well:

Remove your background paper.
Now we have the card base and the background paper, both match and have the half circle cut:

Cut off the upper part of the circle from the background paper:

If you want to add ribbon / bakers twine, etc - now is the time to do it:

 Adhere the background paper to your card base:

Decorate:

 Decorate the inside about half way (this is where you should write your greetings):

Cut a small half circle above that place (~half of the height):

Now you have this. to hold the card standing:

That's it..
(And again, the finished card:)


Friday, December 20, 2013

New card: Oh boy + Tutorial


I started with 8 X 6 card
and scored at 3¼ & 4¼ :


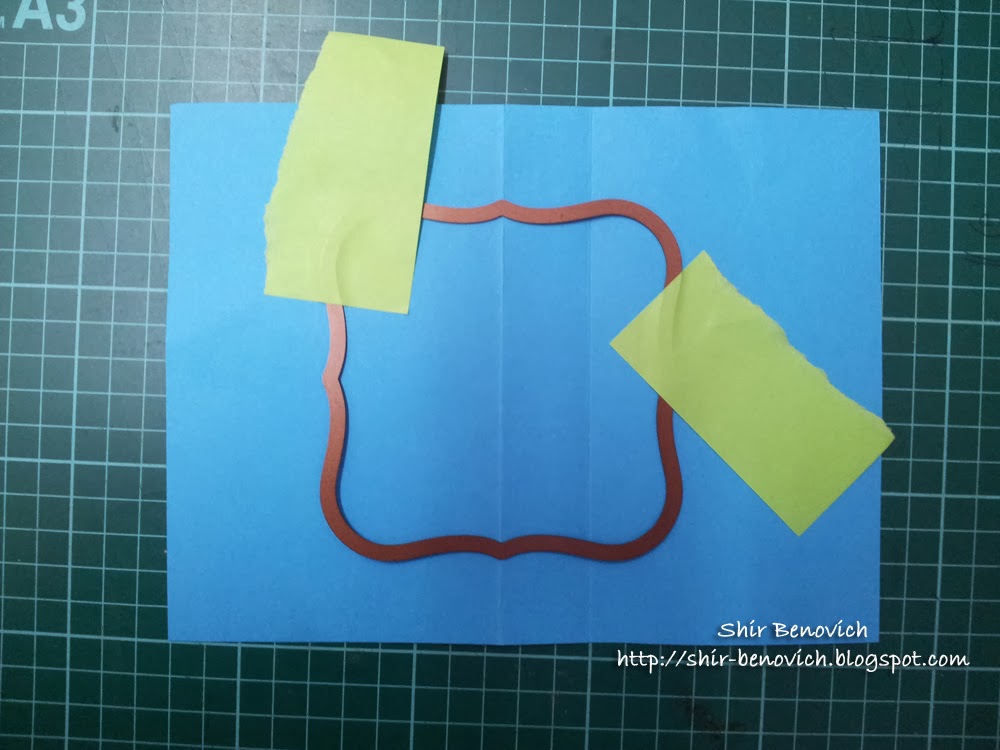
I put a die and centered it on my 4¼ score mark. I used a sticky note to keep it in place:

I ran it through my Cuttlebug twice: one from each direction, until the score mark.
The best way to do it is to put the upper plate (C in my example) only on the part that needs to be cut:

And now on the other side:

When done - the shape should look like this (cut from 2 sides, with a strip not cut): 

I cut the same shape twice, and another 2 shapes - a little smaller:

Adhered to my card:

And on the other side:
The base is ready.
Now decorate...
My card:


If you have any question or comment - please reply...
Thanks for visiting :-)

Wednesday, July 25, 2012

New card: Princess + paper piecing basic tutorial - כרטיס חדש: נסיכה + הדרכה קצרה ל"פייפר פיסינג"


The Hebrew message will be followed by an English one.

פוסט יומולדת... כן, כן - היום :-)
הפוסט השני שלי כחלק מצוות העיצוב של Practical Scrappers הוא כרטיס הנסיכה הזה - הוספתי שלבי הכנה של הנסיכה, בשיטת ה"פייפר פיסינג"

A birthday post... Yes, today is my birthday :-)
My second post to Practical Scrappers is this princess card, and I added the steps for creating the card using the paper piecing technique:


תודה שביקרתן, אשמח אם תשאירו תגובה :-)
Thanks for visiting, I appreciate your comments :-)

Sunday, October 09, 2011

Tutorial: decoration for the Sukkah - הדרכה: קישוט לסוכה


I made a tutorial for making a cute & simple decoration. I made a few, to hang in our sukkah, I hope you enjoy it :-) If you have any questions, please leave a comment or contact me.

הכנתי הדרכה להכנת קישוט חמוד ופשוט לסוכה. בינתיים הכנתי כמה כאלה, בגדלים שונים. 
מקווה שתהנו... ואם יש לכן שאלה הוא הערה - אתן מוזמנות לכתוב / ליצור קשר :-)

We need:
3 strips of paper (in my example 12" X 1.5")
2 circles (I used Stampin' Up 1 3/8" punch)
2 butterflies (I used Martha Stewart punch)
Scoring board
Scissors
Glue
החומרים שנצטרך:
3 רצועות (בדוגמא ברוחב 1.5 אינץ' - אורך 12 אינץ')
2 עיגולים (השתמשתי בפאנץ' של Stampin' Up בקוצר של 3/8 1 אינץ')
2 פרפרים (השתמשתי בפאנץ' של מרתה סטיוארט) - ליצירת תלת מימד, יודבקו אחד על השני
לוח קיפול (כמובן שאפשר גם לקפל "לפי העין")
מספריים
דבק

Score the strips every 1/2" (the space determines the "depth" of the finished decoration)
נסמן קו קיפול ב-3 הרצועות בכל חצי אינץ' (המרווח קובע את ה"עובי" של הקישוט)
 This is how the scores looks:
כך נראים הסימונים והקיפולים מקרוב:

 Adhere the strips to each other, to create one long strip - one overlapping the other, to create a continuous fold: 
נחבר את הרצועות, על מנת ליצור רצועה אחת ארוכה, כמו שנראה בתמונה הבאה, אחד על גבי השני, כדי ליצור המשכיות של הקיפול:

Adhere the start and finish:
נחבר גם את הקצוות זה לזה (לפי המידות האלה ושיטת החיבור שמתוארת בשלב הקודם, גזרתי את הקיפול האחרון מאחד הצדדים):

Flatten the folded strip:
נלחץ את הצד העליון, ונשטח את הקישוט:

If we release it - it'll stretch:
אם נשחרר את האחיזה - הוא יימתח:

Adhere the circles - 1 below & 1 above, in order to keep it closed:
נדביק את אחד העיגולים מקדימה ואת השני מאחורה, במרכז, על מנת לקבע אותו בצורה סגורה:

Add the butterflies:
נוסיף את הפרפר הכפול שלנו, לקשט את הקישוט :-)
 Side view:
וכך הוא נראה מהצד:

I created a few more, different sizes:
והנה עוד כמה "חברים", בגדלים שונים:

And again, side view:
ומהצד:

I appreciate your comments :-)
If you create them, please mail me or leave a comment - I would love to see!
אשמח לקרוא את תגובתכן :-)
ואם אתן מכינות - שלחו לי מייל או השאירו לי הודעה, אשמח לראות!
Related Posts Plugin for WordPress, Blogger...

Followers

Subscribe by mail

Enter your email address:

Delivered by FeedBurner

Wish List

My wishlist

Labels


Shir Benovich Designs Copyright © 2008 Green Scrapbook Diary Designed by SimplyWP | Made free by Scrapbooking Software | Bloggerized by Ipiet Notez